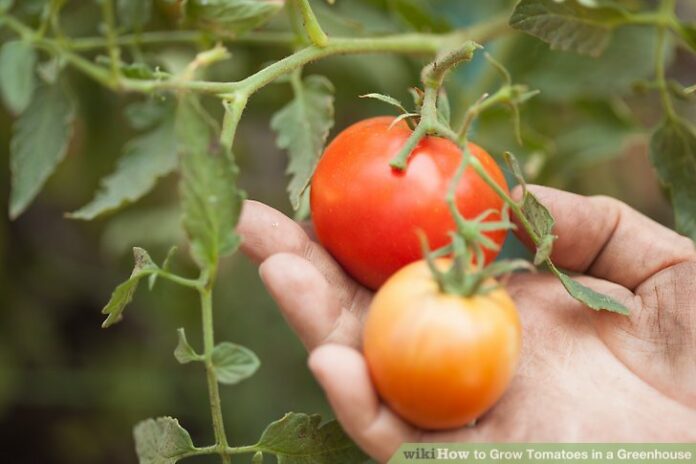
How to profitably grow tomatoes in a greenhouse: Tomatoes are the most popular greenhouse crop on the planet. With good temperature control and plenty of light, greenhouse growers in most areas of the world can get two tomato crops per year. Indoor conditions do require more careful handling to prevent disease and successfully pollinate the flowers.
Setting up of greenhouse.
1.Check temperatures.
Tomatoes grow best at daytime temperatures of (21–27º C), and nighttime temperatures of (16–18º C).Make sure you can maintain these temperatures in your greenhouse for several months before you plant.
- Ideally, bring temperatures to the lower end of this range on overcast days, and raise them to the upper end (or even slightly higher) during clear, sunny days.
- You’ll also need to keep humidity below 90% to prevent excessive leaf mold. Ventilate regularly to bring fresh, dry air into the greenhouse, especially on cool, cloudy morning.
2.Select a tomato variety.
There are thousands of tomato varieties, so for detailed information it’s best to talk to local growers. There are a few guidelines and tips that apply to all regions, however:
- Tomatoes marketed as greenhouse varieties are more tolerant of greenhouse conditions.
- The letters VFNT and A after the name mean the variety is resistant to disease.
- “Indeterminate” tomatoes grow and produce fruit indefinitely, taking advantage of the longer growing season inside a greenhouse. If you’re short on space, plant a “determinate” variety, which stops at a certain height.
3. chose a growing medium.
Tomatoes can grow in any well-draining material. You can use your preferred soil-less mix, or one of these options:
- Perlite bags or rock wool slabs are the cheapest options in many areas.
- Some growers prefer a 1:1 mix of sphagnum peat moss and vermiculite
- Purchase sterile soil mix or make your own. Never use soil or compost from your garden without sterilizing. Choose this option if you do not want to install an irrigation system.
4.Install an irrigation system(recommendation).
Most growers install drip tubing to deliver water to each plant. A fertilizer injector attached to the tubing can automate fertilizing as well.
- Tomatoes are also easy to grow in a hydroponics system.
Planting of tomatoes.
1.Fill a starting tray with potting mix.
Wash the tray thoroughly with soap and water to disinfect it. Fill the tray with any of the potting mixes described above.
- If you use soil, make sure it is sterile.
- If you use a soil-less mix, you’ll also need a seedling nutrient solution
2.plant each seed in its own cap.
Poke a ¼ inch (6 mm) hole into each compartment of the starting tray. Drop a single seed into each hole. Cover lightly with the potting mix.
- Plant about 10-15% more seeds than you plan on growing, so you can discard the least healthy seedlings.
3.moisten with water or dilute nutrient solution.
Use plain water for soil, or seedling nutrient solution for soil-less mixes. Either way, water until the mixture is just damp enough to press into a clump, with only a few drops squeezed out. Water regularly to keep the mix damp.
- A 5:2:5 nutrient solution that contains calcium and magnesium is ideal. Dilute the solution according to label instructions.
4. Keep the tray on warm windowsill.
Do not bring the seeds into the greenhouse until they’ve sprouted, so you can check for disease and pests. Provide plenty of sunlight and keep the temperature at 75–80º F (24–27º C) during the day.
- To keep temperatures under control, you may want to start the tray in partial sun. Move to full sun once all seedlings have sprouted. This usually takes 5 to 12 days.
5.Transport to larger containers.
Transplant the seedlings to small pots in the greenhouse about two weeks after they emerge. After six to eight weeks, or once seedlings are 4-6 inches (10–15 cm) tall, transplant them to larger pots or bags. A typical plant needs roughly ½ to 1 cubic foot of potting material (3.7–7.5 gallons, or 14–28 liters). Even smaller varieties may produce less fruit if grown in smaller pots.
If you see any insects, mold, or disease spots on a plant, do not bring any of them to the greenhouse.
Give each plant about 4 square feet (0.37 m2) of floor space. Planting too close together can reduce airflow and encourage disease.
6.Adjust pH and calcium levels.
Before the final transplant, you may want to check soil pH, which ideally falls between 5.8 and 6.8. If your soil is too acidic, add about 1 tsp (5 mL) hydrated lime for each gallon (3.8 L) of potting mix. Besides raising the pH, this adds calcium that can prevent blossom rot later on.
- If your pH is fine, mix in gypsum or calcium sulfate instead to add calcium without changing the pH. Alternatively, just choose a fertilizer that contains calcium and apply every week or two.
- In a hydroponics setup, you can supply calcium by injecting calcium nitrate into the irrigation feed. This requires a second injector, as calcium nitrate cannot be stored with your main fertilizer.


