

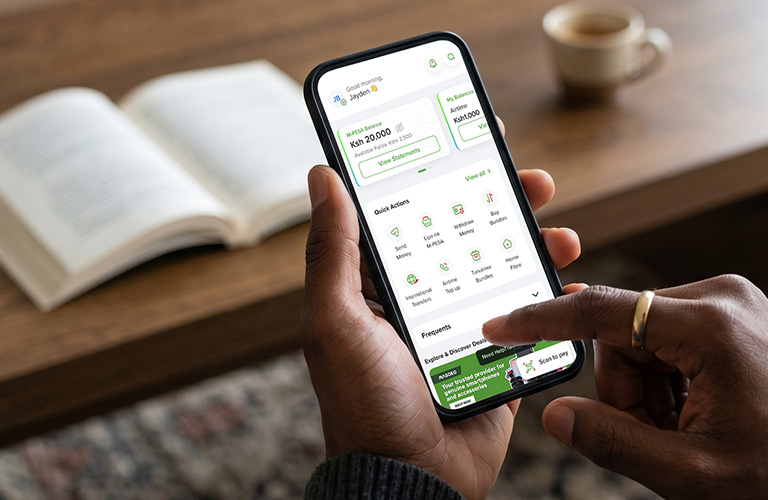
There was a time when managing my mobile services meant juggling different USSD codes, mobile apps, or visiting a Safaricom shop for services that should have taken only a few minutes.
At times, the experience felt frustrating. Just like many people, I wanted a simpler way to stay in control of my account without the inconvenience.
Then came news about Safaricom merging the M-PESA App with the Safaricom App into a single platform called My OneApp.

To be honest, I wasn’t exactly excited. In fact, I deliberately ignored every prompt asking me to update my M-PESA app.
In my mind, if two apps I was already used to were being squeezed into one, surely it would only make things more confusing. So I kept postponing the update, convinced I was making the smart choice.
Well, Safaricom clearly had other plans. One morning, I picked up my phone only to discover the app had updated itself automatically.
My first reaction? “Wait… what happened to my M-PESA app?” For a few moments, I clicked around wondering where everything had gone.
But as I explored the new MyOneApp, my confusion quickly turned into appreciation. Ironically, the very change I had been avoiding turned out to be exactly what I had been looking for all along.
Today, it has become one of the applications I open almost every day because it brings several Safaricom services together in one place.
Keeping Track of My Usage Is Effortless
One of the first things I appreciated was how easy it became to monitor my account. Instead of guessing how much data or airtime I had left, I can instantly check my balances the moment I open the app.
This has become far much simpler compared to previously when I had to struggle with different USSD codes to check my balance.
Buying Bundles Takes Just a Few Moments
Previously, purchasing data or voice bundles often meant remembering different USSD codes. With MyOneApp, everything is clearly organized.
I simply select the bundle I want, complete the purchase, and continue with my day. The process feels straightforward and saves valuable time.
Managing My M-PESA services is more convenient
Another feature I frequently use is the integration with M-PESA services. Whether I need to check my balance, review transactions or access various mobile money services, the app provides a convenient starting point without unnecessary complications.
Exclusive deals add extra value
My OneApp occasionally provides access to exclusive offers and promotions. From discounted bundles to personalized deals based on my usage, these offers have helped me stretch my spending further than I initially expected.
Customer support is always within reach
Whenever I encounter a challenge, I no longer feel the need to search for customer care contacts. The application provides access to support resources that make it easier to resolve common issues or seek assistance when necessary.
Paying bills has become more convenient
The application also simplifies bill payments and account management. Instead of switching between different platforms, I can complete several tasks from one location.
Additionally, I don’t have to cram several Paybill numbers for bill payments as the app has the option to save frequent payment numbers. This makes it easier to make payments for bills such as rent, school fees and utilities.
Everything is centralized in one place
Perhaps the biggest advantage for me is convenience. Rather than relying on multiple applications or memorizing several service codes, My OneApp brings together account management, purchases, M-PESA services, customer support and personalized offers in a single platform.
That level of integration makes everyday mobile management much time consuming.
Getting Started with My OneApp
If you are interested in trying the application yourself, getting started is straightforward.
Step 1: Open the Google Play Store on an Android device or the Apple App Store on an iPhone.
Step 2: Search for “Safaricom My OneApp”.
Step 3: Download and install the application
Step 4: Launch the app after installation.
Step 5: Register or sign in using your Safaricom mobile number.
Step 6: Verify your number using the one-time verification code sent to your phone.
Step 7: Complete your profile if prompted and grant the necessary permissions.
Step 8: Begin exploring the available services, including buying bundles, checking balances, accessing M-PESA features, managing your account and viewing personalized offers.
Also Read: Pochi la Biashara vs Lipa na M-PESA Buy Goods: Which is best for your business?


Easy for users within the country. Terrible for users out side the country. I hope they’ve fixed the log out issues. Most of us still have the old Mpesa app. We had to go back to avoid the trouble that was the first few weeks of the new app. We’ll migrate once they fully shut down functionality on the old app. By then, I am confident that all the problems with the new app will have been sorted.
Comments are closed.